The stack for building and launching an app with AI
How to get started with each tool, publish your app and create a video with Genjutsu.
Open each tool to see what it does, how to get started and what to check. Then follow the Genjutsu tutorial and prepare a post in HeyMark.
The stack and how to get started
The stack is the app’s set of tools. Choose tools for what you need to build: start with an agent and add data, payments or emails when your app needs them.
Select a tool to see the steps.
Claude Code or CodexWrite, test and review code


From the start; choose one
Claude Code and Codex turn your instructions into changes within your project: they read files, write code and run tests. The result is an app you can open and review.
Install either one, sign in and open your project folder. Describe what you want to build and ask it to start with one feature. If you already have code, say what it should preserve. Then open the app and test the change; if it fails, share the error or a screenshot.
The video shows Claude Opus 5.5 and GPT Sol as model options. The model solves the task; Claude Code or Codex lets it work with the project’s files and tools. Get started with Claude Code or Codex.
ConductorWork with agents in separate workspaces

Optional for organizing the work
Conductor organizes agents’ work on your code. You can dedicate a workspace to each task and review its changes separately. Each workspace has its own Git branch, keeping those changes separate from the main version until you merge them.
Add your app’s repository and create a workspace. Check that the app can run there, choose the agent and attach the task description, screenshots or files it needs.
When it finishes, open the app, run the tests and review the modified files before merging the work. The desktop app runs on Mac. Create your first workspace.
SupabaseStore data, register users and store files

If you need accounts or stored data
Supabase stores your app’s data. It also provides Auth for sign-up and sign-in, and Storage for files such as photos or documents. Use the parts you need.
Create a project and ask the agent to connect your app and configure the tables that will store its data. If you have accounts, add access rules (RLS): they define what each user can read or change.
Save data through the app and reload to check that it stays there. Try another account to verify that private data is not visible. Supabase tutorial and access rules.
VercelDeploy the app and its updates

Once the app works on your computer
Vercel hosts your app so other people can open it from a link. When connected to GitHub, it can publish new versions as you push code changes.
Import the repository and configure environment variables: the values your app needs to connect to other services. Ask the agent which are missing and where to put them.
To review changes, use a Preview deployment and test the main feature at its link. Check who has access before sharing it. The Production deployment is the version your users will see. Connect GitHub and preview and production environments.
LinearTrack tasks, bugs and priorities

To track pending tasks
Linear helps you track what needs building, what is broken and what you’ll do first. Each task has a description, an owner and a status.
Create a project for your app. Add one issue per change and describe what should happen when it’s done. For a bug, write the steps to reproduce it and attach a screenshot.
Give that task to the agent. Test the result in the app before marking it done. Create issues in Linear.
BlacksmithRun tests and builds in GitHub Actions

Optional, if you already use GitHub Actions
Blacksmith runs your GitHub Actions tests and builds on its own machines. It helps speed up those checks when waiting for them starts slowing down your work. A build prepares your app’s code to run or be published.
If you already use GitHub Actions, connect the repository to Blacksmith and follow the quickstart to change runs-on: that line selects the machine for each automated task.
Push a change and open Actions in GitHub. Check that the same tests and build finish successfully, and compare their duration with previous runs.
StripeCharge for a plan or subscription

When you are ready to test payments
Stripe handles payments for your app. You can sell a one-time purchase or a subscription; Checkout is the page where users enter their details and pay.
Create the product and its price in the test environment. Ask the agent to connect Checkout from the server and configure a verified webhook: a notification from Stripe that tells your app when to activate or change access.
Test a payment and a cancellation. Check that access continues or ends according to the plan’s terms, and that a failed payment does not activate it. Then you can move to real charges. Subscription guide.
ResendSend emails from the app

When users need a notification
Resend sends the emails that come from your app: a welcome message, a confirmation or a notification. You configure when to send them in your code, and Resend handles delivery.
To send from your brand, add your own domain. Resend provides DNS records to copy into your domain provider for verification. Then create an API key, the credential your server uses to send emails.
Ask the agent to connect email sending and test it with your address. Review the sender, content, links and delivery status. Verify the domain and send your first email.
PostHogMeasure what people do inside the app

Before inviting your first users
PostHog helps you see whether people use the feature you built and where they stop. Your app sends it events: records of actions such as opening a screen or completing sign-up.
Create a project and install the integration for your app. Ask the agent to track the action you want to measure, then try it yourself. Check that one event arrives each time you complete it.
In Product Analytics, create a funnel with the steps users need to follow. You’ll see how many reach each step and where they drop off. Installation and create a funnel.
Higgsfield / GenjutsuCreate AI videos

When preparing launch content
Within Higgsfield, Genjutsu lets you create a video using a reference clip, images and a prompt. We use Motion transfer to replace a character.
Choose a video or preset, attach the person’s portrait and describe who you want to replace. Check the cost before generating, then review the face and movements in the result.
The tutorial below shows the process with Nik’s photo and a scene from Spider-Man, including the recordings and the prompt we used.
HeyMarkPlan, publish and analyze your social media with AI

When introducing the app
HeyMark connects what you plan to publish with what you’ve already posted and its results. When you connect your social accounts, it brings your content into the calendar. Each post holds the video, text, versions and team comments; afterward, you can review how it performed.
To launch your app, create a draft, attach the video and prepare the caption with Mark, HeyMark’s assistant. It can consult your brand context and previous posts. Review the proposal, choose the social network and schedule the date.
You can also connect HeyMark to Claude or ChatGPT to look up posts and metrics or prepare drafts from the chat. You work with your actual data without copying it by hand. See how to connect Claude.
Agent-friendly tools let an agent read their documentation and work with them through code or commands. Vercel and Supabase, for example, offer MCP connections. Check which permissions you grant when connecting them.
Create a video with Genjutsu
To introduce your app, explain the problem it solves. Write what you think about that problem, talk about it on camera or record the app in use. You can also try AI videos: here you’ll learn to replace a character with Genjutsu.
We replaced Peter Parker with Nik in a 16-second Spider-Man clip. Mary Jane walks through the cafeteria, slips, and Peter turns to catch the tray. We used a Genjutsu preset and this portrait:
The reference photo

The Genjutsu result
You need access to Genjutsu in Higgsfield, your own video or a preset, a portrait, and ChatGPT or Claude to prepare the prompt.
Choose the video in Genjutsu
- Open Genjutsu
Visit Higgsfield, sign in and select Genjutsu from the menu. You can also open Genjutsu directly.
- Upload your video or choose a preset
Use the reference video area to upload your file or find a scene in Motion Library. We chose the Spider-Man preset for this example.
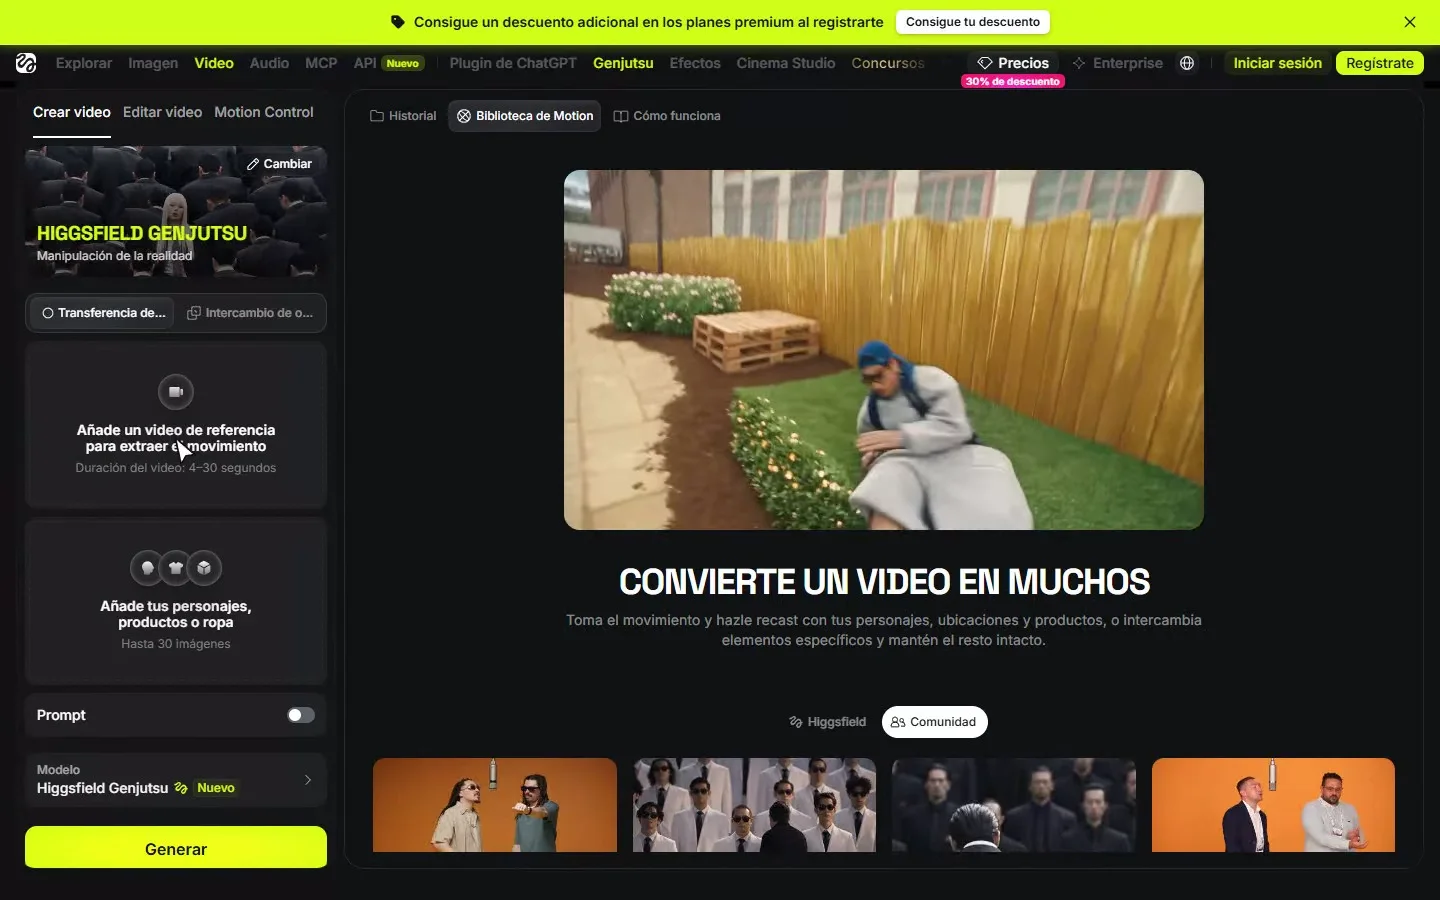
Select Motion transfer, the mode used in this example.
Prepare the prompt with ChatGPT or Claude
Attach the original MP4 and the portrait. We used Nik_retrato.png and the segment that starts when Mary Jane walks with her tray and ends when Peter catches it.
If your chat cannot accept the video, upload screenshots of the beginning, action and ending, and describe what happens between them. Check supported formats for ChatGPT and Claude.
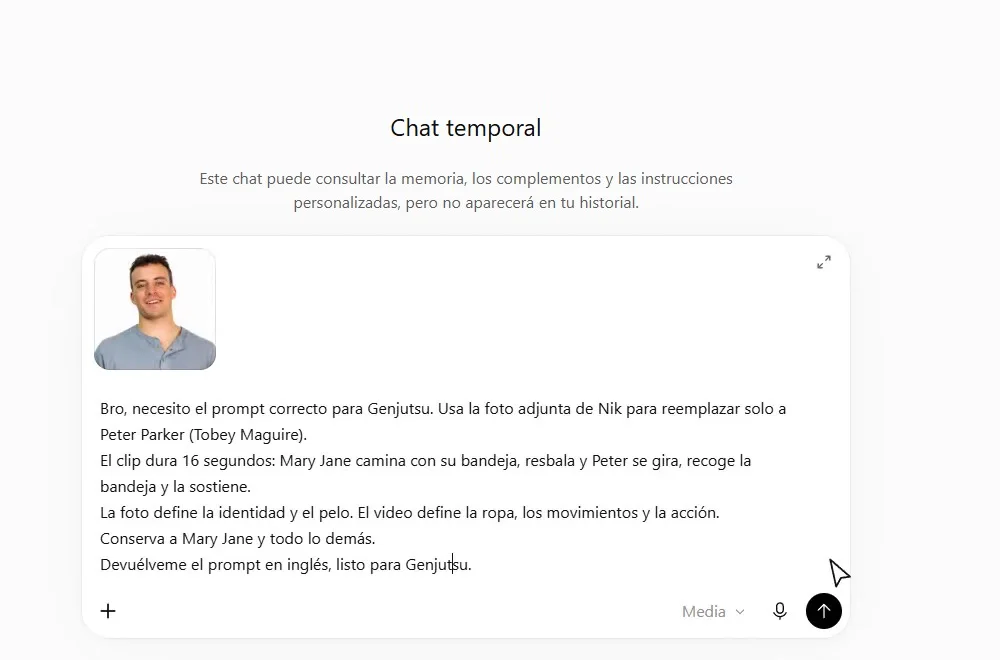
Our request
We gave ChatGPT this draft to correct. image.png referred to Nik’s photo:
Our initial draft for ChatGPT
Replace the male character (Peter Parker / Tobey Maguire) sitting at the school cafeteria table in video with the young man from image.png. The replacement character should keep the exact same facial features, short buzz-cut hairstyle, and physical appearance as the man in image.png, while perfectly matching the male character's movements, reactions, catches, facial expressions, timing, lighting, and clothing in photo. Maintain the exact original female character, cafeteria environment, camera angles, and tray-catching action from video;
The corrected prompt
ChatGPT corrected two details: Nik’s hair is textured with a longer top, and the clothing should come from the video. The photo defines identity and hair; the video defines clothing and action.
ChatGPT's final prompt for Genjutsu
Edit the provided 16-second cafeteria clip. Replace ONLY Peter Parker, the male character seated at the cafeteria table, with the young man shown in the attached reference portrait. This is a precise character replacement within the original footage, NOT a recreation or reinterpretation of the scene.

IDENTITY REFERENCE:
Use the portrait exclusively for the replacement man's facial identity and hairstyle. Preserve his recognizable facial features, face shape, eyes, eyebrows, nose, lips, jawline, facial hair, and short dark hairstyle with a textured, slightly longer top and shorter sides. Do not give him a buzz cut. Maintain the same identity consistently across every frame, camera angle, head turn, and partial occlusion.

PERFORMANCE AND CLOTHING:
Use the source video as the exact reference for body position, head movements, eye direction, reactions, facial expressions, hand movements, and timing. The replacement must perform the original character's actions exactly as they occur, rather than maintaining the reference portrait's smile or pose. Keep the original character's clothing from the VIDEO unchanged. Do not transfer the portrait's shirt or necklace. Maintain natural head-to-body proportions and seamless alignment with the neck and body.

PRESERVE THE ORIGINAL ACTION:
Keep the existing sequence exactly as filmed: Mary Jane walks through the cafeteria carrying her tray, slips, and the male character turns and reacts, catching and holding the tray. Preserve every original interaction, the tray's trajectory and orientation, the falling food and objects, and the precise timing and positions of all catches. Do not add, remove, repeat, slow down, or reinterpret any action.

EVERYTHING ELSE MUST REMAIN UNCHANGED:
Preserve Mary Jane exactly as she appears in the source video, including her face, hair, clothing, movements, and expressions. Do not replace or modify any other person. Keep the cafeteria, background students, tables, props, framing, camera movement, cuts, shot order, and original audio unchanged.

Match the source footage's lighting, shadows, color grading, skin shading, focus, motion blur, and film texture. Preserve correct occlusion wherever hands, hair, the tray, or other people overlap the replacement character.

The result must look like the exact original 16-second film clip, with only the male character's identity changed. No face morphing, identity drift, flickering, oversized head, altered hands, additional fingers, redesigned props, or new shots.
For another scene, change the duration, character and action. The prompt requests that the original visuals and audio be preserved; check that the result follows those instructions.
Return to Higgsfield and generate
- Upload the portrait
With your video or preset selected, upload the photo in the characters, products or clothing area. You must attach it in Higgsfield too.
- Paste the prompt
Enable Prompt and paste the corrected text. If you attach several photos, type @ to link each image to the character it replaces.
- Generate
Review the quality and cost shown in your account. Click Generate and wait for the result.
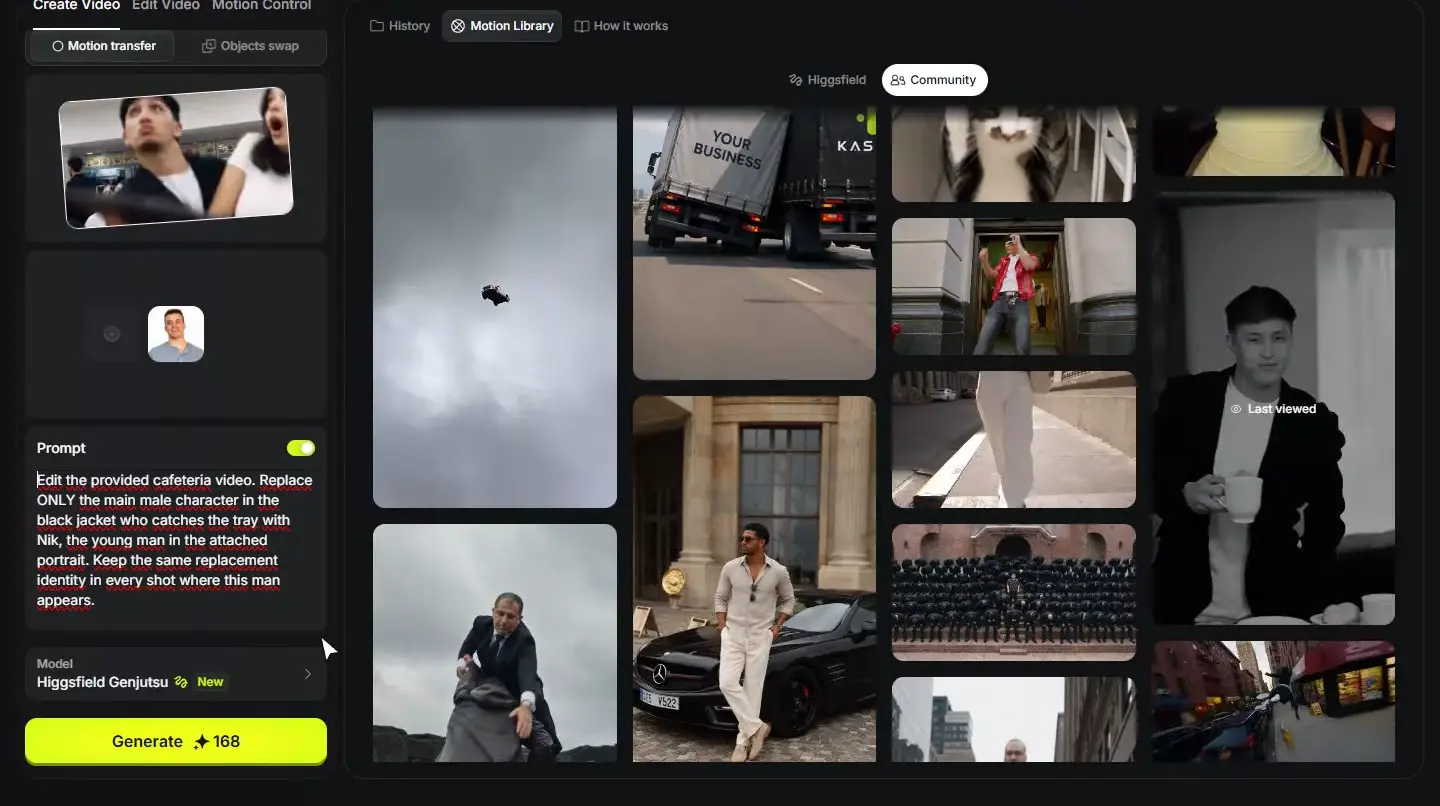
Review the result
Watch the entire clip. Pause when Peter turns his head and catches the tray: check the resemblance to Nik, the hands and the tray’s position. Check that Mary Jane, the background and the audio stay the same.
If something fails, correct that detail in the prompt and generate another version. For example: “As he turns to catch the tray, the face stops looking like Nik. Preserve his identity during that turn.” Compare the versions and download the one you will use.
Prepare the launch with HeyMark
Bring the video to HeyMark and create a draft for the social network where you’ll introduce your app. Write the caption yourself or ask Mark to prepare it using your brand context and previous posts.
Attach the video and provide your app’s link. This request tells Mark what to prepare and leaves the post waiting for your review:
Prepare the draft with Mark
Review my brand context and recent posts. Prepare a draft for social network introducing app name to type of user. The app lets people feature and solves problem. Use the attached video and this link: app URL. Write the caption in my brand’s tone and invite people to action I want them to try. Use only the features I described; ask me if any information is missing. Save it as a draft for me to review before scheduling.
Open the draft, review the video and caption, and choose a publication date. If you work with a team, they can comment on the same post before you schedule it. Afterward, check that it was published and review its metrics and comments.
You can also make that request from Claude with HeyMark connected. Follow the connection guide.
Review the post’s metrics in HeyMark. In PostHog, check how many people complete your app’s main action.
Check where people stop and what they tell you after trying it. Add the problem you find to Linear and ask the agent to fix it.
Now put it to work.
HeyMark learns the rules you just wrote down, then plans, drafts, schedules and replies in that voice. You approve.